Victorian Update - Under-Skirt
Listening to: Metallica- Whiskey, Fuel, Memory Remains
Since there are so many pictures today, I have made them small. Click to see them bigger. Hopefully it all makes sense.
Testing
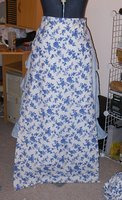
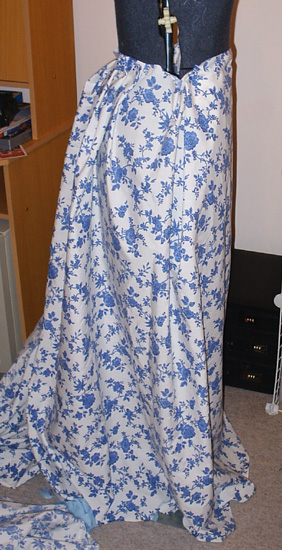
First I got my length of material and tested out the basic idea for the skirt. The plan was just to drape the skirt on the form and cut the pieces, rather than, say use the petticoat pattern again, modified a bit to be closer fitting. (I mention this because the final skirt pieces, eventually, ended up being the same as the petticoat pattern, albeit closer fitting....). Picture of material pinned on to the form in the basic idea, roughly pleated at the back. You can see in this picture that there should be a front piece, ending at the front-side where the waist-band dips in; a side piece going from that vertical line where the front piece would end to where the pleats start, curving from the waist out towards the back and then down; a back piece, probably mostly a rectangle. What I decided at the time was to do a front piece and a side-back piece. (Now that I look at the finished skirt, I see that the side piece does not in fact have enough curve at the top to curve out over the bum, although it does flave out nicely as it goes down to accomodate the petticoat. But of course, we aren't up to that bit yet.)
The material is pretty much exactly as wide as skirt needed to be long - 110-114cm. Draping
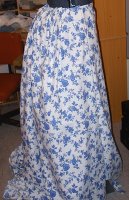
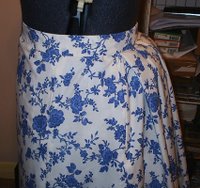
I started by pinning the material so the edge of one end fell about where the one edge of the front piece should go, pinned it on at the top at the waist, and then - I was very clever!! To work out where I should cut the material for the front off from the rest of it and form the curve from the waist over the hips, I make my self a plumb-line by attaching a pair of scissors to the end of some jute twine I had been using to finish the peticoat. Then I held that in front of where I wanted the seam for the front to go and pinned down where the string indicated. ie. I used the sting to make sure that the seam would be perpendicular to the ground when viewed from the side. I'm not very good and making or seeing straight lines, so I thought this was a clever way of doing it. Of course, now it is finished it doesn't seem to be sitting properly, but theoretically, if I was obsessive about these thing I would adjust the pieces for the strains produced by the finished item and make it again, but I don't really care. You can't see it with the overskirt, or even with the jacket anyway. And the plumb-line method is still cool for finding a vertical line. This is the front view, and a side view of my theoretical vertical line. After marking the line with pins, I took the material off the dummy, folded it so the two pins marking the sides of the top of the front piece matched, and cut along the line marked by the pins, thus creating the curve for both sides and cutting out the piece. Yay.
 For the back and side I think I just used a rectangle. I pleated it along the back over the bustle, and thus ascertained how much material I would need and chopped it off.
 Pinning
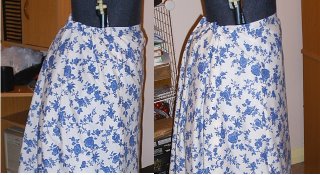
After everything was cut I sewed the seams and pinned it again to see how it looked. Now we have some before and after photos. The first is how I had pinned the pleats in the back. First it was like the first photo, but much better as the second photo.
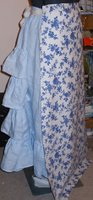
 Then we have the side. The first is the skirt as it was originally made, with no separate side panel. Try as I might, I could not get the material at the side to lie correctly, and you can see wrinkles at the top there. I eventually realised that a side panel would help, because it was also looking wrong further down; it was pulling in further down instead of curving out nicely over the petticoat. So I undid the seams and cut a shaped side piece by following the line of the petticoat out, so it really was a side panel covering just the side, not curving around to the front or back at all. It didn't follow the line of the bastle as well, as that doesn't actually reach around to the side, and the pleats would take care of that. I think I also curved the edge that joins the front panel in at the waist, which I think is why my mice vertical line I mentioned before it not so vertical anymore - it is pulling in to compensate for the curved side piece that really didn't need to curve. Now I have pieces similar to the petticoat pattern. (Have I actually written about the petticoat yet? Only some I think.)
 Half-way
After getting all my pieces more or less right, I made a waistband and hand-sewed it on as I did with the petticoat, while it was still on the dummy so I didn't have to hold onto everything. I had pinned the pleats and just sewed. Sew sew sew.
 To get the hem straight and so on, I needed to consider the fact that I would need to take less material off the back than the front because the back has further to go, over the bustle, so is already shorter. So I tried it on and got G to pin up a bit at the front to some sensible length. This was 3" from the edge so I wanted to take off 2", leaving 1" for a hem. I couldn't just do this on the dummy because I am not quite sure that it is properly adjusted to my heigt. It actually seems to be very close but I am never sure. Then I put it back on the dummy and pinned up the 2" and then pinned the rest up so it was the same distance from the ground, took it off and laid it out, drew a cutting line and then chop chop chop. There was actually quite a difference (nearly the whole 2") between the amount removed from back and front, so I felt clever for remembering to think of it. Then I ironed it and hemmed it by hand, because there might be curves and if there are curves then when I sew it by machine it will pull funny and end up with annoying diagonal creases in the hem and look ugly. Although, it is going to have a ruffle over it so you won't see it, but I hate the diagonal lines, and I hemmed it either while talking to people or watching TV, so it didn't really take up any time.
Finishing
Next I had to cut two lots of material to make the two flounces at the bottom which, theoretically and according to the description here, should be put on with but a little fullness, and that mostly towards the back. This was headed by what is apparently a double puff and ruffle, which I was going to sew on in a most sensible way by starting sewing it on at the top upside down, folding it over that seam so it doesn't show, and then sewing along the next two gathers to make two puffs and a ruffle. But I forgot and started from the bottom so wasn't able to sew the top seam invisibly, but I did sew it on by hand so it is probably hardly noticable anyway.
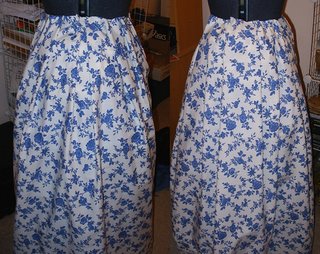
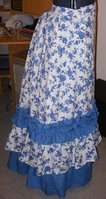
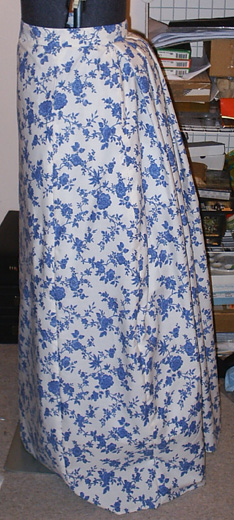
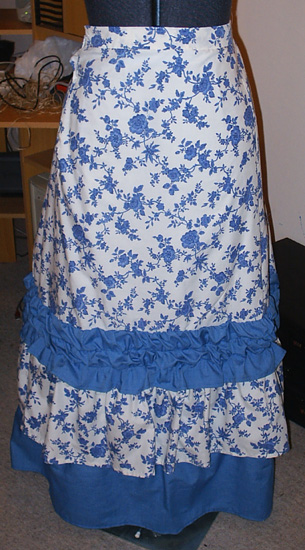
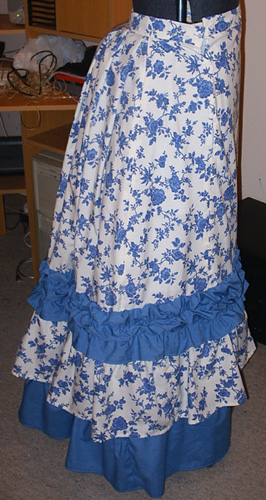
Here is a picture of the finished skirt from the side and the front. How nice.
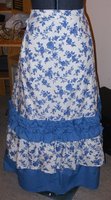
 And here is the puff 'n' ruffle. So, it is like two gathered tubes at the top with a frill at the bottom (created with three rows of gathering and then sewn on.
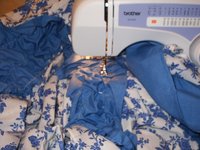
 And this is the view of the most fun bit - sewing on the puff 'n' ruffle while the sewing machine and I are completely surrounded in bits of skirt - I am up to my elbows! A sea of material, so cool. There is enough information in that picture to reasonably reliably identify my sewing machine. Don't buy one, although they are probably the cheapest one you can find new, you should instead buy a second-hand one that is at least 20 years old. Mum now has 3 that fit that criteria pretty much (hey, I'm sure she was supposed to be giving me one - one is so beutifully retro coloured too) and they are pretty much all better than my new one, and cheaper. One of them is actually about AS annoying as mine, but only cost about 1/7 of the price. The others are better. The second-hand sewing machine buying frenzy was started when I went over and helped Mum sew something and her old sewing machine was SO SO much better than mine it was ridiculous. This is the sewing machine that is older than me. Not like my crappy piece of crap... Anyway, picture. (Maybe I will provide you with a sewing machine buying guide some time.)
Since there are so many pictures today, I have made them small. Click to see them bigger. Hopefully it all makes sense.
Testing
First I got my length of material and tested out the basic idea for the skirt. The plan was just to drape the skirt on the form and cut the pieces, rather than, say use the petticoat pattern again, modified a bit to be closer fitting. (I mention this because the final skirt pieces, eventually, ended up being the same as the petticoat pattern, albeit closer fitting....). Picture of material pinned on to the form in the basic idea, roughly pleated at the back. You can see in this picture that there should be a front piece, ending at the front-side where the waist-band dips in; a side piece going from that vertical line where the front piece would end to where the pleats start, curving from the waist out towards the back and then down; a back piece, probably mostly a rectangle. What I decided at the time was to do a front piece and a side-back piece. (Now that I look at the finished skirt, I see that the side piece does not in fact have enough curve at the top to curve out over the bum, although it does flave out nicely as it goes down to accomodate the petticoat. But of course, we aren't up to that bit yet.)
The material is pretty much exactly as wide as skirt needed to be long - 110-114cm.
 Draping
I started by pinning the material so the edge of one end fell about where the one edge of the front piece should go, pinned it on at the top at the waist, and then - I was very clever!! To work out where I should cut the material for the front off from the rest of it and form the curve from the waist over the hips, I make my self a plumb-line by attaching a pair of scissors to the end of some jute twine I had been using to finish the peticoat. Then I held that in front of where I wanted the seam for the front to go and pinned down where the string indicated. ie. I used the sting to make sure that the seam would be perpendicular to the ground when viewed from the side. I'm not very good and making or seeing straight lines, so I thought this was a clever way of doing it. Of course, now it is finished it doesn't seem to be sitting properly, but theoretically, if I was obsessive about these thing I would adjust the pieces for the strains produced by the finished item and make it again, but I don't really care. You can't see it with the overskirt, or even with the jacket anyway. And the plumb-line method is still cool for finding a vertical line. This is the front view, and a side view of my theoretical vertical line. After marking the line with pins, I took the material off the dummy, folded it so the two pins marking the sides of the top of the front piece matched, and cut along the line marked by the pins, thus creating the curve for both sides and cutting out the piece. Yay.

 For the back and side I think I just used a rectangle. I pleated it along the back over the bustle, and thus ascertained how much material I would need and chopped it off.
 Pinning
After everything was cut I sewed the seams and pinned it again to see how it looked. Now we have some before and after photos. The first is how I had pinned the pleats in the back. First it was like the first photo, but much better as the second photo.
 Then we have the side. The first is the skirt as it was originally made, with no separate side panel. Try as I might, I could not get the material at the side to lie correctly, and you can see wrinkles at the top there. I eventually realised that a side panel would help, because it was also looking wrong further down; it was pulling in further down instead of curving out nicely over the petticoat. So I undid the seams and cut a shaped side piece by following the line of the petticoat out, so it really was a side panel covering just the side, not curving around to the front or back at all. It didn't follow the line of the bastle as well, as that doesn't actually reach around to the side, and the pleats would take care of that. I think I also curved the edge that joins the front panel in at the waist, which I think is why my mice vertical line I mentioned before it not so vertical anymore - it is pulling in to compensate for the curved side piece that really didn't need to curve. Now I have pieces similar to the petticoat pattern. (Have I actually written about the petticoat yet? Only some I think.)
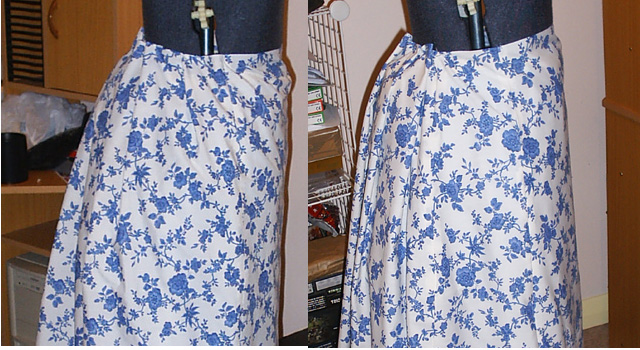 Half-way
After getting all my pieces more or less right, I made a waistband and hand-sewed it on as I did with the petticoat, while it was still on the dummy so I didn't have to hold onto everything. I had pinned the pleats and just sewed. Sew sew sew.

 To get the hem straight and so on, I needed to consider the fact that I would need to take less material off the back than the front because the back has further to go, over the bustle, so is already shorter. So I tried it on and got G to pin up a bit at the front to some sensible length. This was 3" from the edge so I wanted to take off 2", leaving 1" for a hem. I couldn't just do this on the dummy because I am not quite sure that it is properly adjusted to my heigt. It actually seems to be very close but I am never sure. Then I put it back on the dummy and pinned up the 2" and then pinned the rest up so it was the same distance from the ground, took it off and laid it out, drew a cutting line and then chop chop chop. There was actually quite a difference (nearly the whole 2") between the amount removed from back and front, so I felt clever for remembering to think of it. Then I ironed it and hemmed it by hand, because there might be curves and if there are curves then when I sew it by machine it will pull funny and end up with annoying diagonal creases in the hem and look ugly. Although, it is going to have a ruffle over it so you won't see it, but I hate the diagonal lines, and I hemmed it either while talking to people or watching TV, so it didn't really take up any time.
Finishing
Next I had to cut two lots of material to make the two flounces at the bottom which, theoretically and according to the description here, should be put on with but a little fullness, and that mostly towards the back. This was headed by what is apparently a double puff and ruffle, which I was going to sew on in a most sensible way by starting sewing it on at the top upside down, folding it over that seam so it doesn't show, and then sewing along the next two gathers to make two puffs and a ruffle. But I forgot and started from the bottom so wasn't able to sew the top seam invisibly, but I did sew it on by hand so it is probably hardly noticable anyway.
Here is a picture of the finished skirt from the side and the front. How nice.
 And here is the puff 'n' ruffle. So, it is like two gathered tubes at the top with a frill at the bottom (created with three rows of gathering and then sewn on.
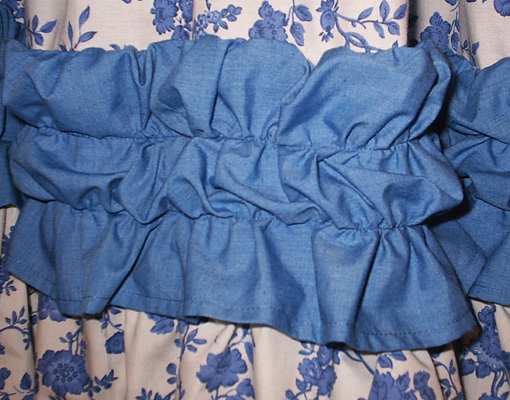 And this is the view of the most fun bit - sewing on the puff 'n' ruffle while the sewing machine and I are completely surrounded in bits of skirt - I am up to my elbows! A sea of material, so cool. There is enough information in that picture to reasonably reliably identify my sewing machine. Don't buy one, although they are probably the cheapest one you can find new, you should instead buy a second-hand one that is at least 20 years old. Mum now has 3 that fit that criteria pretty much (hey, I'm sure she was supposed to be giving me one - one is so beutifully retro coloured too) and they are pretty much all better than my new one, and cheaper. One of them is actually about AS annoying as mine, but only cost about 1/7 of the price. The others are better. The second-hand sewing machine buying frenzy was started when I went over and helped Mum sew something and her old sewing machine was SO SO much better than mine it was ridiculous. This is the sewing machine that is older than me. Not like my crappy piece of crap... Anyway, picture. (Maybe I will provide you with a sewing machine buying guide some time.)


Comments