Victorian Update - A Chemise, of sorts
Another quickly made item in my Victorian era outfit was the chemise. It is probably not really historically accurate at all, but was designed in my usual method of thinking for these things. I looked at some pictures, couldn't really find pictures from the correct few years, found some general descriptions, made something up, simplified things, had various disasters, made some more stuff up and finished it.
The bits I knew:
Then I just had to make it up.
I used my general torso pattern, drafted from the instructions in my pattern making book, intending to keep the vertical darts at the waist, but removing the one in the shoulder at the back. Actually, I didn't remove the back shoulder dart, I just ignored it. This led to my Major Problem in making this item. I also adjusted the arm-holes to be a little lower and changed the neckline to be deeper. My linen was about exactly as wide as I am around at the widest part, so I just decided that that was going to be how big the chemise was and there was no discussion entered into. It was so almost exactly I wasn't sure that it was actually going to work, and it also meant the skirt part couldn't flare at all, but that's ok because I wanted it to be pretty much all close-fitting.
Back to shoulder darts - these reduce the length of the back shoulder seam so it matches the front shoulder seam, and in close-fitting tailored garments makes the fabric fit over the shoulder blade area, which presumably sticks out more than the other bits of the back or something. This means that if you just ignore them, the edge of the shoulder finishes somewhat further out because you aren't folding away that extra material. What I think I did is matched up this further out shoulder seam with the rest of the pattern and with the front of the pattern, meaning that the whole back was wider than it was supposed to be. So instead of using the inside shoulder seam edge which doesn't change - the bit that meets with the neckline - as a reference for drafting the rest of my pattern, I used this outer edge and didn't take into account the fact that if I wasn't going to do the darts and that it would be further out.
So anyway, the point is, the back was really wide at the top. The front was ok though. So, I couldn't cut down the back and make a seam because it was only wide at the top. I tried my new favourite technique, pleating, and kind of pleated the back from the neck to the waist, using two pleats, to use up the excess material. I did this while it was on the dress dummy and I can say dress dummies are very useful. With the front and back pinned together on the dummy I looked at it and thought about it a lot and decided it would probably work and chopped a little bit off the side seams at the waist.
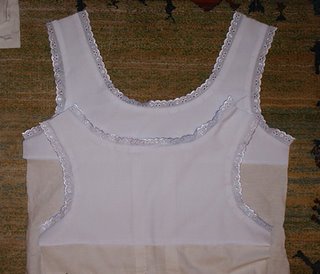
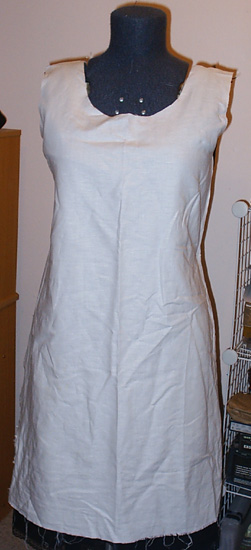
Picture of the front with front and back pinned at side seams.
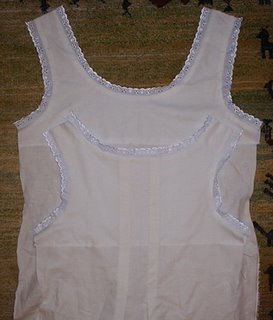
 And this is a picture of the pleats I put in the back. See how the pleats open at the bottom (at the actual bottom, now that I think about it) to accomodate the widening of the hips from the back.

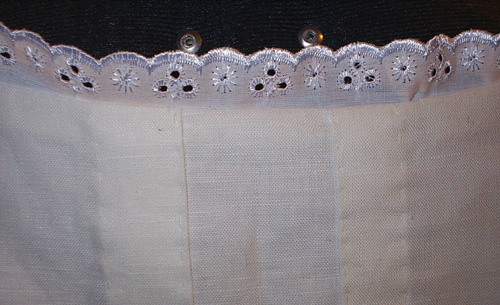
And here is a close up of the top of the sewn in pleats.
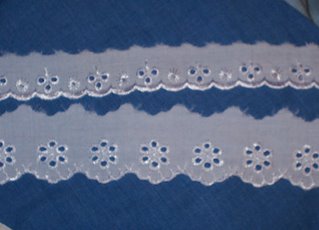
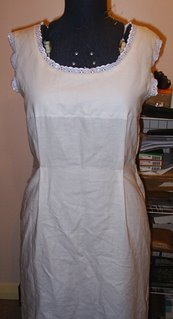
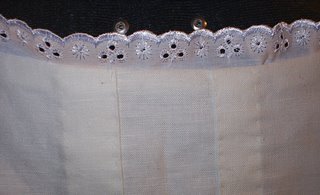 As you can see on those pictures, there is lace around the neckline. Also around the arms and wider lace around the hem. The two laces kind of actually match, sort of. There are similarities anyway.
 Because sewing hems around curves is incredibly annoying, I faced the top and bottom with some white cotton before sewing on the lace. You can also see the lace in this picture.
 Facings can be annoying because they often aren't attached at one edge, so you either have to sew it on invisibly like with hems, or just leave it loose. And then also finish the edge somehow so it doesn't fray. I couldn't be bothered with all that, it is so annoying, so I just sewed the facing to the outer layer, so you could see the line of stitching on the outside, which matched a picture I saw of a more authentically made one, so that is good.
 Normally the front would need darts to shape it, so I was going to put in darts, but then I just pinned the material in the middle of the dart while it was on the dress dummy, and thought that looked ok as it was. Plus it was easier than actually sewing in the dart and getting it the right shape and angle and so on. It could sort that out itself.
 So we have the pleats, the darts, the facing and the lace. After that I sewed up the side seams, and it was all done. I think this took 1-2 evenings.
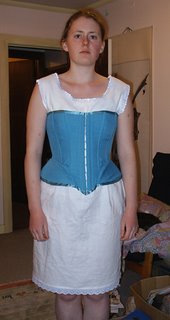
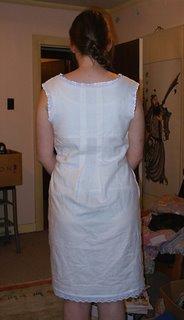
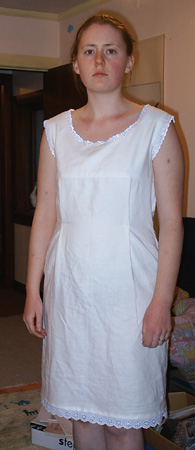
Pictures of me wearing it, back and front, plus with the corset which is worn over it. Works quite well. Although I'm sure the bottom front of that corset is not the right shape.
Please attempt to pretend that you can't see my face in these pics, I can't be bothered chopping them up but it is embarassing to be pictured there in underwear! Sort of. Looking a little bit angry. But at any rate, I look like I am actually somewhat shaped like my dress dummy Val, and it actually fits.

The bits I knew:
- chemise should be relatively short (knee to mid-calf?)
- no sleeves
- square or round neckline (maybe v-neck but this was only specifically talked about for later years)
- lace is common decoration
- generally closely fitted because bodices became more fitted and slim at this time
Then I just had to make it up.
I used my general torso pattern, drafted from the instructions in my pattern making book, intending to keep the vertical darts at the waist, but removing the one in the shoulder at the back. Actually, I didn't remove the back shoulder dart, I just ignored it. This led to my Major Problem in making this item. I also adjusted the arm-holes to be a little lower and changed the neckline to be deeper. My linen was about exactly as wide as I am around at the widest part, so I just decided that that was going to be how big the chemise was and there was no discussion entered into. It was so almost exactly I wasn't sure that it was actually going to work, and it also meant the skirt part couldn't flare at all, but that's ok because I wanted it to be pretty much all close-fitting.
Back to shoulder darts - these reduce the length of the back shoulder seam so it matches the front shoulder seam, and in close-fitting tailored garments makes the fabric fit over the shoulder blade area, which presumably sticks out more than the other bits of the back or something. This means that if you just ignore them, the edge of the shoulder finishes somewhat further out because you aren't folding away that extra material. What I think I did is matched up this further out shoulder seam with the rest of the pattern and with the front of the pattern, meaning that the whole back was wider than it was supposed to be. So instead of using the inside shoulder seam edge which doesn't change - the bit that meets with the neckline - as a reference for drafting the rest of my pattern, I used this outer edge and didn't take into account the fact that if I wasn't going to do the darts and that it would be further out.
So anyway, the point is, the back was really wide at the top. The front was ok though. So, I couldn't cut down the back and make a seam because it was only wide at the top. I tried my new favourite technique, pleating, and kind of pleated the back from the neck to the waist, using two pleats, to use up the excess material. I did this while it was on the dress dummy and I can say dress dummies are very useful. With the front and back pinned together on the dummy I looked at it and thought about it a lot and decided it would probably work and chopped a little bit off the side seams at the waist.
Picture of the front with front and back pinned at side seams.
 And this is a picture of the pleats I put in the back. See how the pleats open at the bottom (at the actual bottom, now that I think about it) to accomodate the widening of the hips from the back.
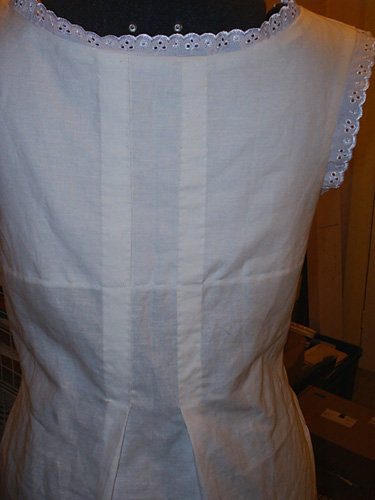
And here is a close up of the top of the sewn in pleats.
 As you can see on those pictures, there is lace around the neckline. Also around the arms and wider lace around the hem. The two laces kind of actually match, sort of. There are similarities anyway.
 Because sewing hems around curves is incredibly annoying, I faced the top and bottom with some white cotton before sewing on the lace. You can also see the lace in this picture.
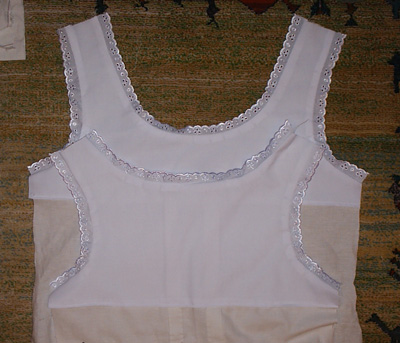 Facings can be annoying because they often aren't attached at one edge, so you either have to sew it on invisibly like with hems, or just leave it loose. And then also finish the edge somehow so it doesn't fray. I couldn't be bothered with all that, it is so annoying, so I just sewed the facing to the outer layer, so you could see the line of stitching on the outside, which matched a picture I saw of a more authentically made one, so that is good.
 Normally the front would need darts to shape it, so I was going to put in darts, but then I just pinned the material in the middle of the dart while it was on the dress dummy, and thought that looked ok as it was. Plus it was easier than actually sewing in the dart and getting it the right shape and angle and so on. It could sort that out itself.
 So we have the pleats, the darts, the facing and the lace. After that I sewed up the side seams, and it was all done. I think this took 1-2 evenings.
Pictures of me wearing it, back and front, plus with the corset which is worn over it. Works quite well. Although I'm sure the bottom front of that corset is not the right shape.
Please attempt to pretend that you can't see my face in these pics, I can't be bothered chopping them up but it is embarassing to be pictured there in underwear! Sort of. Looking a little bit angry. But at any rate, I look like I am actually somewhat shaped like my dress dummy Val, and it actually fits.


Comments