Magpie Moth Caterpillar Bustle, Part 3 - The Finished Item
I think this will probably be mostly pictures of the finished item, but I shall try to write some details.
Earlier in the process, I had made a black rectangle and put darts in it at the top to form the base for the bustle - the darts help make it fit better to a butt. I just did this on the dress dummy, but if you didn't have one, just chuck in the same darts as in a fitted skirt, or make it up.
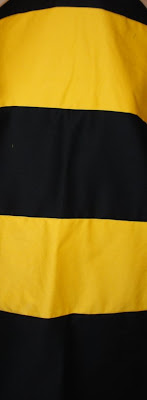
Then, I tried to calculate how big the stuffed channels should be which you can do by getting some material and pinning it on how you think it should go and then taking it off and measuring the material. Or you could make it up. I also wanted the material to be gathered horizontally, because this makes it curve as the gathered bit is longer than the base material it is sewn onto. I thought if it curved by itself that would be good as I wouldn't have to think about how to create a curved shape. Once again, either try some gathering or just make it up to work out how wide to make the material. Then I cut black and yellow strips and sewed them together. I immediately wanted to make more things out of black and yellow as it looked awesome.
 The darted base material makes the bit that sits against you, but then you need another piece to gather the the big piece onto to make the stuffing channels. The cushion we made earlier goes between the two base pieces. For my second base piece I think I just got a rectangle and shaped the top to be a bit narrower.
Then, I marked where the rows would be and I gathered, and I sewed the big piece on, and I stuffed it with that white stuffing stuff and sewed the edges down. The channels don't go all the way to the top, so that there's a bit to, well, do what it has to do. Just look at the picture from the side further down, then you'll see!
Then I sewed this stuffed section to the darted base piece and mucked around with it a bit to make it work and I hemmed the edge. I attached a nice yellow ruffle.
 I made a waistband that ties at the front.
 It was mostly sewed by hand actually, the gathering of the main section and sewing it on, and the frill. It also has three button holes on the underside so that you can put the cushion inside and button the cushion in to hold it there. And this is the whole thing, finished!!
 See, the top of the bit of material has to go out a bit, so we can't have the channels go all the way to the top.
 Here is is with some material roughly pleated over it, to see how it would work with a skirt. It works!
 I also want to put another tie that kind of goes around the hips to make sure it stays close, but now I can make the skirt. :)
Earlier in the process, I had made a black rectangle and put darts in it at the top to form the base for the bustle - the darts help make it fit better to a butt. I just did this on the dress dummy, but if you didn't have one, just chuck in the same darts as in a fitted skirt, or make it up.
Then, I tried to calculate how big the stuffed channels should be which you can do by getting some material and pinning it on how you think it should go and then taking it off and measuring the material. Or you could make it up. I also wanted the material to be gathered horizontally, because this makes it curve as the gathered bit is longer than the base material it is sewn onto. I thought if it curved by itself that would be good as I wouldn't have to think about how to create a curved shape. Once again, either try some gathering or just make it up to work out how wide to make the material. Then I cut black and yellow strips and sewed them together. I immediately wanted to make more things out of black and yellow as it looked awesome.
 The darted base material makes the bit that sits against you, but then you need another piece to gather the the big piece onto to make the stuffing channels. The cushion we made earlier goes between the two base pieces. For my second base piece I think I just got a rectangle and shaped the top to be a bit narrower.
Then, I marked where the rows would be and I gathered, and I sewed the big piece on, and I stuffed it with that white stuffing stuff and sewed the edges down. The channels don't go all the way to the top, so that there's a bit to, well, do what it has to do. Just look at the picture from the side further down, then you'll see!
Then I sewed this stuffed section to the darted base piece and mucked around with it a bit to make it work and I hemmed the edge. I attached a nice yellow ruffle.
 I made a waistband that ties at the front.
 It was mostly sewed by hand actually, the gathering of the main section and sewing it on, and the frill. It also has three button holes on the underside so that you can put the cushion inside and button the cushion in to hold it there. And this is the whole thing, finished!!
 See, the top of the bit of material has to go out a bit, so we can't have the channels go all the way to the top.
 Here is is with some material roughly pleated over it, to see how it would work with a skirt. It works!
 I also want to put another tie that kind of goes around the hips to make sure it stays close, but now I can make the skirt. :)


Comments